Enamel – a fantastic way to bring some colour into what can often become a world of black and white when working with silver.

vitreous kiln fired enamel jewelry
This week, I have been testing a set of colours from Thompson Enamels – transparent/lead free for use on silver/copper/gold. Enamel is powdered glass which, when heated melts, flows and hardens to a smooth, durable vitreous coating on metal. Enameling can also be done on glass or porcelain, but requires enamels with a different COE (Coefficient Of Expansion) – expansion rates must be suited to the base surface material.
Prior to using enamels, they need to be washed to remove the “fines” – (extra fine particles which can cause your enamel to be cloudy).
This can either be done:
wet: by rinsing in water multiple times until the water runs clear
or dry: by using a series of sifting pans to separate the particle sizes (60, 80, 100 mesh etc.)

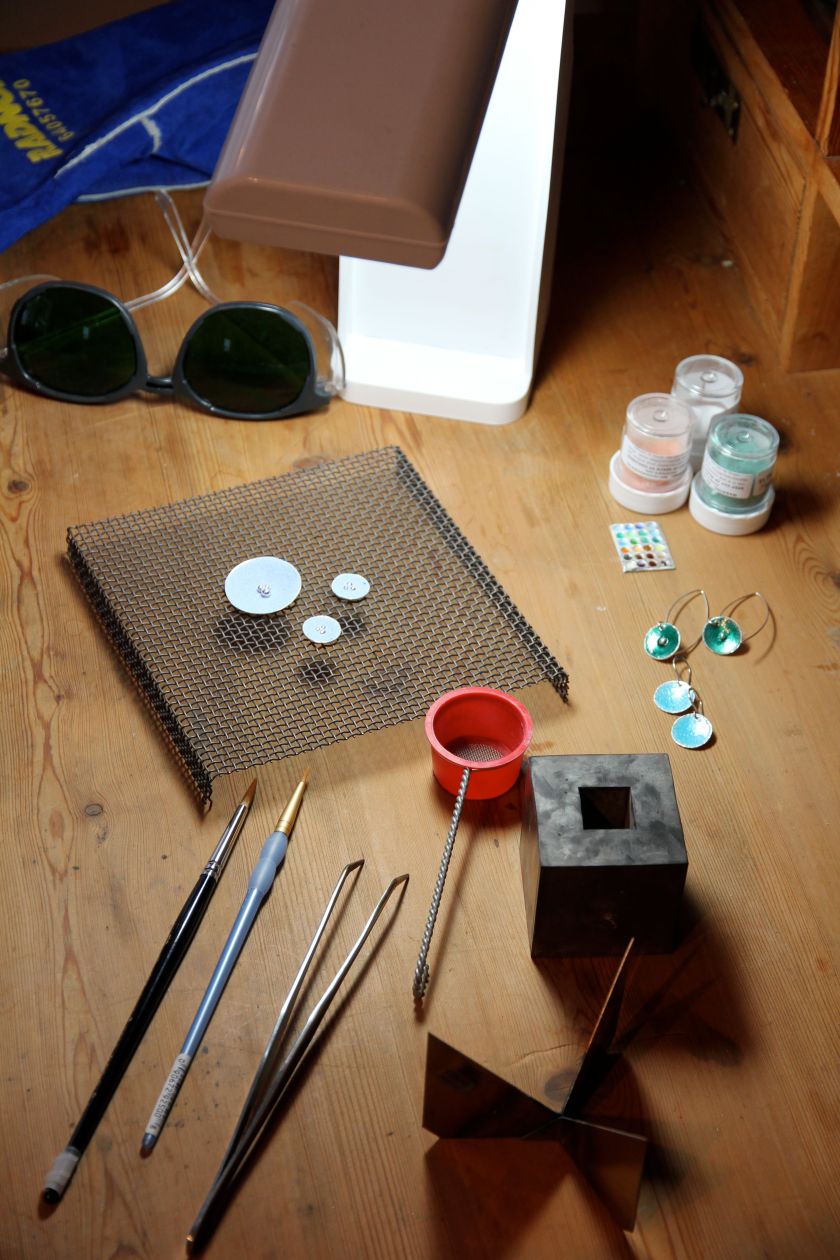
sifted enamel on silver – ready for the kiln
Regardless of which technique you plan on using to apply the enamel, the silver must be properly prepared, polished and cleaned to remove all traces of dirt and oils that would prohibit the fusing of the glass on the silver.
Dry sifting technique: To apply the powdered enamel, a mesh sifter is used to evenly distribute it across the surface. Depending on the piece, a holding medium can be used such as ‘Klyr-fire’ to help ‘glue’ the enamel until firing. (Make sure the klyr-fire has dried prior to placing in the kiln).
Enamel can be fired with either a torch or a kiln. Torch firing, due to the fluctuations in temperature can cause uneven results and allow for the oxidation of the particles producing discoloration of the enamel. These effects are sometimes desirable for artists, but for my preference, kiln firing is the only way to go.

Paragon Xpress 14A kiln with bead/enameling door
Firing in a kiln produces an even heat (around 800 degrees celcius for enameling) which engulfs the entire piece, which is unattainable when torch firing.
When I purchased my kiln, I knew that eventually enamel would find its way in to my repertoire of skills, so I selected a kiln with a bead/enamel door on the front which would allow me to have access to my work without opening the main door letting the heat escape. You would be amazed at how fast you can drop down 100 degrees.
When using a kiln, certain safety precautions must be taken. Always have a non-flammable surface in front of your kiln door. Should you accidentally drop a piece of red hot metal it would be nice not to set fire to your studio. I use a Solderite pad which can withstand over 900 degrees. Use kiln gloves religiously.. (go ahead.. ask me why! – I am the queen of burns – you should see my left hand at the moment. Kitchen accident NOT studio accident). And never look into your heated kiln without proper eye protection (you can burn your retina and cause permanent eye damage). The photos in this post were taken while I was wearing my green workglasses.

the setup
When enamelling, I cover my kiln floor with a fibreglass cloth to prevent any molten glass from sticking to the surface. a raised mesh metal stand is used to support the pieces, and a kiln fork is used to place it in the kiln via the beaddoor.

peeking through the beaddoor
Due to the variance in temperatures and firing times for the different colours, testing is important. What may take 2 minutes for one colour, could take 4 for the next. The best way to know is to watch for the signs.
Enamel goes through a variety of phases as it goes from powder to smooth glass; first comes the sugar stage, then the orange peel stage. As it passes this stage, one must watch to make sure that it does not overfire. This can cause separation and discolouration of the enamel.
Once done, remove from kiln. You will notice that as it cools, the colour will change. Do not quench your piece in water or the glass will shatter.
Then, you are done!

making samples.. and this set is for me!
NOTE: when buying enamel jewelry: The term ‘cold enamel’ does not refer to true glass enamel. It is a term that has surfaced in recent years in an effort to upscale what is essentially dyed resin – a mix, pour and set plastic.

Loved the detail on the tutorial. I was looking around for information on the solderite pad and found this blog. What a pleasant suprise!
Excellent tutorial! One of the best I’ve seen! Thanks.
My husband bought me a kiln a year ago and I have not fired it up yet. To nervous, I guess. I’ve wanting to do enamel pieces and your blog here has been the most helpful to me so far.
Take the plunge Chris! You will love it 🙂
Cynthia
Your enamel pieces r beautiful. Since u also felt, my question is: can u recommend a glue to help attach felt to silver? I’ve learnt felting for almost 4 years & started silver this year. Tried to encase felt in a silver cuff which I fold formed. Looks great except wool being so springy, it’ll pop off after a few hours of wear. Thanks. Jackie
Hi Jackie,
I use E6000 adhesive. For a good bond, you need to rough up your silver. It takes a good 24 hours to set properly, do not be tempted to test it any sooner, as that will affect the strength of the bond. For large pieces of felt on a curved surface, I would recommend a framed area such that all edges are secured and not subject to wear and tear. I would also only use very well fulled hard felt, rather than a spongy type.
For a permanent bond using E6000, it has been recommended to place the piece in a 375 degree oven as soon as the adhesive is applied and let cool to room temp – I must stress that if doing this, you do it in an oven that is NOT used for food prep. I have a kiln and small oven in my studio for such applications. Safety first!
Good luck 🙂
Cynthia