All posts tagged: norsk design

New tool in the studio

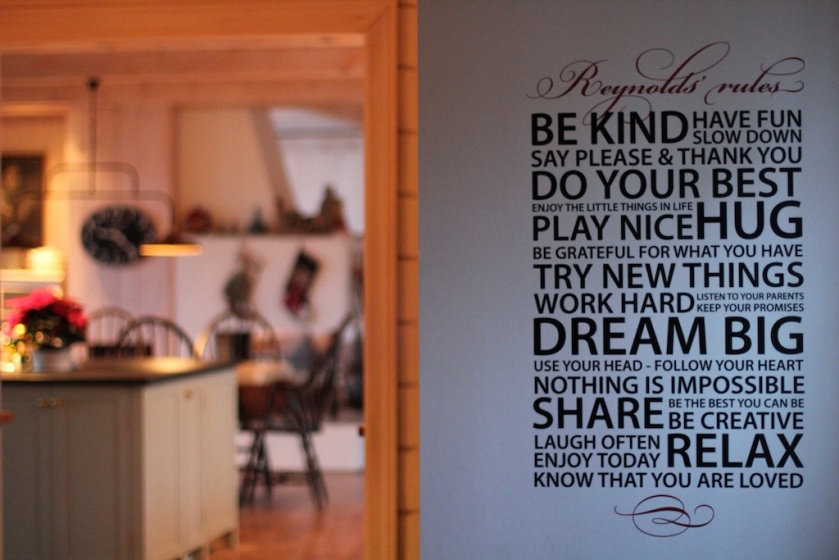
Over the holidays, the studio welcomed its newest tool, a plotter (cutter). There are many on the market, each having their own pros and cons, but after having done some research, I found the one for me. I have always had a love for words.. quotes and sayings… and being a font addict with a reasonable handle on graphic design and a love for Adobe Illustrator, the possibilities with this machine are endless! It cuts so much more than vinyl… cardstock, fabric, stencils for glass etching and fabric stenciling, heat transfer for clothing.. and I have even sourced reflective heat transfer for clothing. That may sound crazy to most of the world, but living in Norway, the dark season makes wearing reflects mandatory. My son has decided he wants to start a business selling his own reflects designs.. and he is only 8! Time to make space in the studio. Yesterday I made my first wall piece from vinyl. Well beyond the standard size of the plotter (the wording is just over a meter high), …

leather handles on felt bags

A while back, I blogged about the raw wool felted laptop bag (see post) that I created for myself, and I thought I would show how the handles were made. Store bought handles of all shapes, sizes and colours are available in most craft stores (or online), but in my opinion, nothing beats a good quality, handmade, adjustable thick leather strap with solid brass fittings. I have not used a pattern for doing this.. I simply gauge the size based on the bag and what feels comfortable. The only factor to consider is the width of your buckle. I cut five pieces of leather, one for the strap, and two shorter pieces that are doubled over and secured to the felt itself using chicago screws (leather bond optional), and two narrower pieces that are looped to keep the strap from flailing about. The side pieces are very simple.. an oval hole in the middle for the buckle to pivot, and in this case two holes matched up on each side.  Punch matched holes in your …

The life of a Maker… studio time

I managed to get in some studio time of late to finish off some orders, and get a few pieces photographed. Years ago I read that an artist should take photos of everything they make regardless of whether it is going to be a personal gift or go up for sale (or already sold for that matter). Time to start getting into the habit. Jewelry photography is a tedious task, requiring very bright lights with a light tent to control reflections and shadows. I keep thinking I need to set up a photo spot in the studio, such that it is not such an effort setting everything up each time. My children spend quite a bit of time with me in the studio.. asking questions, playing on the floor.. digging through all the tools and supplies while dreaming of what they want to make next (they now even have their own cupboard of supplies). It has been a productive time, and with studio visits scheduled later this week with neighborhood children, there will be lots …

felted laptop bag – using raw fleece

Forever inspired by my dear friend Elis Vermeulen of Holland to work with raw fleece (see my previous post on working with Texel with Elis), I decided to make myself a laptop bag a while back using my favorite medium. I have yet to add the straps (really need some studio time this week), but will be using some good quality leather with a buckle to make it adjustable. The base is made using norwegian C1  (I planned for a shrinkage of 30%). It is the perfect wool for sturdy bags. It produces a nice firm felt that hardly pills and wears well.  Now to pull out a hide of leather and some brass findings. Oh! by the way, if you are interested in learning more about how to work with raw fleece, Elis will be teaching a bag class at the Creative Felt Gathering in Michigan this september. See her website for more details, or contact her to arrange a workshop in your area.

Kiln fired enamel

Enamel – a fantastic way to bring some colour into what can often become a world of black and white when working with silver. This week, I have been testing a set of colours from Thompson Enamels – transparent/lead free for use on silver/copper/gold. Enamel is powdered glass which, when heated melts, flows and hardens to a smooth, durable vitreous coating on metal. Enameling can also be done on glass or porcelain, but requires enamels with a different COE (Coefficient Of Expansion) – expansion rates must be suited to the base surface material. Prior to using enamels, they need to be washed to remove the “fines” – (extra fine particles which can cause your enamel to be cloudy). This can either be done: wet: by rinsing in water multiple times until the water runs clear or dry: by using a series of sifting pans to separate the particle sizes (60, 80, 100 mesh etc.) Regardless of which technique you plan on using to apply the enamel, the silver must be properly prepared, polished and cleaned to …

the big picture

As most artists know all too well, November and December is the busy season, holiday sales carry many of us through the rest of our year. Months ago, as the end of summer approached, the deadline for deciding in which holiday shows to participate came up, and I had to make a decision. In past years I have had open studios, inviting the public in to my atelier to see how and where my products are made. Last year, I took part in the Designers Fair (juried entry) at DogA, the Norwegian Center for Design and Architecture on Hausmannsgate in Oslo, 10,000 people in 2 days – exhausting but worthwhile! This year, the invites for various shows came in and I realized that regardless of what options I chose, the workload would be pretty much the same, long hard days in the studio working on new series and collections, evenings back in the studio polishing silver or ironing textiles, display work, pricing, labeling, packaging supplies, being away from my children on the holiday weekends, and stressing …

bomaki shibori – tutorial

Lately I have had been reading everything I can get my hands on regarding shibori, the japanese art of creating texture and colour on cloth. There are an incredible variety of styles and techniques that are encompassed in the Shibori classification. Here are some photos (and a quick tutorial) of a piece I made using the bomaki shibori technique.

Designernes eget Julemarked – DogA

This weekend I participated in the Design Fair at DogA (Norwegian Center for Design and Architecture) It is one of Oslo most anticipated annual christmas markets. Around 10,000 people attend this event annually, queuing up outside in all sorts of weather to be able to get their hands on some of the latest in Norwegian Design. I am genuinely pleased with my weekend, and learned so much in the process. Prior to attending the event, I gave myself a goal for sales and I must admit, I exceeded my expectations. I went through 750 business cards, and realize that next time I need to bring more! The chance to get ones work seen by so many in such a short period of time is a fantastic opportunity. But most of all I met some lovely people in the process, both in the way of designers who were selling their work, as well as customers who left with smiles on their faces. One young lady in particular stands out in my mind… she returned three times …

Tutorial – handmade felt covered buttons

Felters who make handmade felt all have felt lying around that was either a sample test, a project that just was not right or simply bits left over from larger projects. There is nothing like handmade wool felt, and event the smallest pieces never get thrown away, after all.. each piece was lovingly made by hand! For those of you who are not felters, follow these directions using just about any fabric.