All posts filed under: Tutorial

local meat – butchering and processing

As mentioned in my earlier post, we have a pig that we slaughtered earlier this week, and when you have that kind of meat coming into your house, you are best to have some sort of plan as to how you want to manage it. We did a lot of reading in advance (highly recommended), and arranged to have all of the tools/supplies need as well as cleared our calendar in order to take care of the meat. Now that we are all done, we have seen that it took us three days with multiple people each day in order to manage the task. This is definitely a group project! Here is how we broke it down: Day 1: Slaughter halving of the carcasses removal of heads hanging Day 2: Butchering cutting the primals leg shoulder belly loin deboning the legs and removal of hooves tying and packaging roasts, ribs and chops scraping stock bones setting aside fat and meat for grinding and sausage production Day 3: Production / Processing making stock from the bones seasoning for dry curing …

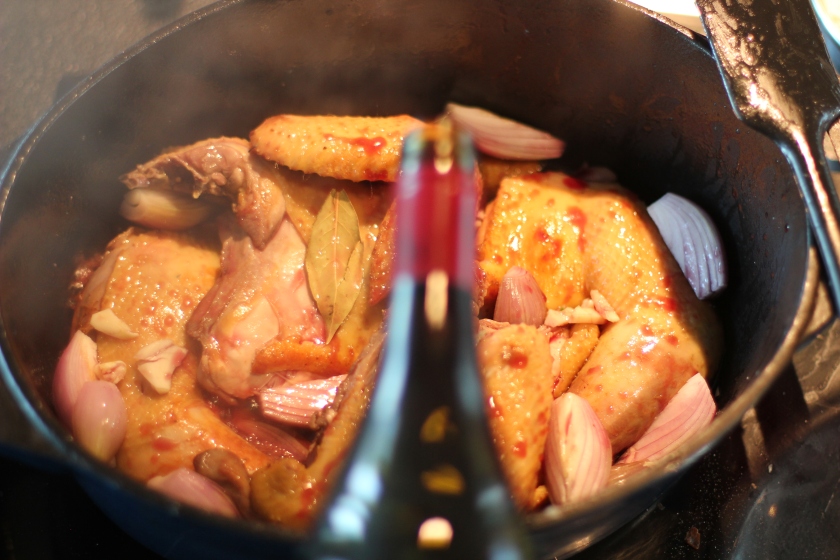
Coq au vin and stock from rooster feet

When you raise hens in your garden, you are bound to end up with more than a rooster or two. We opt to let ours enjoy life with the girls, happily free-ranging until the day comes, when it is time to become part of our food cycle. We have learned quite a bit about how to take care of them in a humane and careful manner. I will not go into the details in this post, but will try and write about it sometime in the future. But for the time being, what do you do with a rooster? I have always been a fan of coq au vin, many people make it with chickens, because roosters (unless you raise your own) can be very hard to come by. You will find a variety of recipes online, each with their own nuance. Some call for armagnac vs. cognac, pearl onions vs. shallots, I say go with what you have and feel free to experiment. But one of the key ingredients is a good quality chicken stock. …

Upcycled and put to new use

  Every year for my daughters birthday, we try and include an activity as part of her birthday celebration. The girls are getting older, and it is a delight to see them work together. Last year, as part of the UN declaring 2015 the year of the Soil, we planted tomatoes (see our blog post here), I have heard some managed to even keep the plants going all season and enjoyed the ‘fruits of their labour’. This year, we decided to do upcycle old clothes and silk test samples from the studio into hair accessories, they were all very pleased with the results, so am I. To learn how to make fabric covered button parts, you can read my post from 2009 here. The details about adding pony tails is also included. My daughter who is now 10, is in full production mode to make a series that she can give as gifts, and maybe even sell 😉  

Bagels – Montreal Style!

Anyone who has ever been to Montreal for more than an airport layover knows about our bagels. No, even if you have eaten bagels in Boston, New York, Toronto or anywhere else, you still have not tried the good ones. It is a simple matter of fact.. and no.. I am not in the least bit biased 😉 Montreal bagels are the perfect combination of sweet, savoury, crunch and chewiness! They are anything but a bun with a hole in it. Sunday morning bagel runs, 3AM post party bagel line ups at Fairmont or St Viateur, waiting your turn at the bagel factory watching them come straight out of the wood fired oven is a Montreal ritual, you do not even need to put any toppings on them. But if you do, you know that nothing beats ‘bagels and lox’! It was only when I moved to Norway that I learned that salmon is called ‘laks’ in norwegian, I loved that, having calling smoked salmon ‘lox’ since my childhood. Every time I visit my gang back …

foraging – spruce tip syrup – granskudd sirup

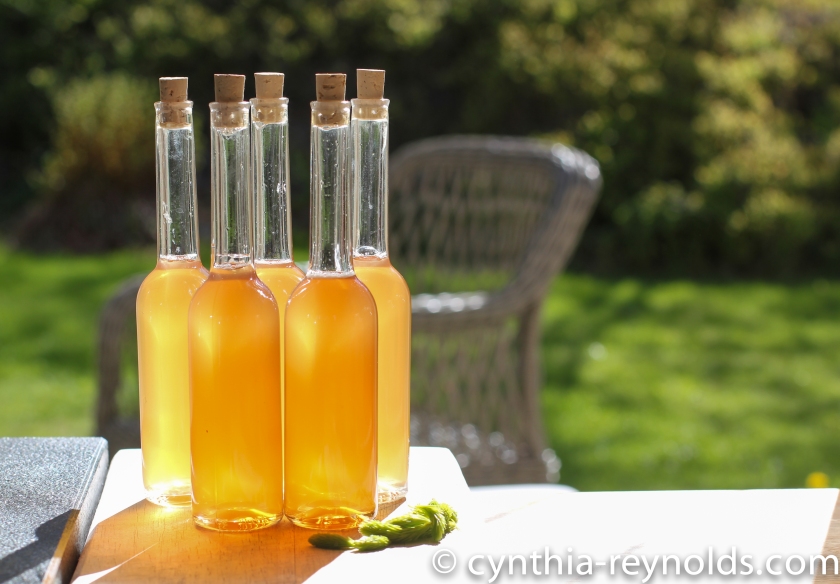
Living and eating through the seasons means one needs to enjoy the bounty while it is at its peak and preserve it. Our home, a timber summer house built in 1921 is known by the name Granbakken, which means ‘Spruce Hill’ in norwegian. It is simply appropriate that spruce tip syrup is on the agenda for local goodness. The children and their friends are more than happy to gather the ingredients for many of our concoctions 😉 Spruce has many purported benefits, and one can preserve spruce tips in a variety of ways: dried and combined with salt as my dear friend Louise does with a variety of plants made into a tincture/dram/schnapps via infusing with alcohol made into a pesto similar to ramsløk/wild garlic using pine nuts, garlic, olive oil and parmesan/pecorino romano dried and pulverized and added to a multitude of recipes but one that we enjoy purely for the taste is syrup, and it is so simple to do! bring the spruce tips and water to a rolling boil turn down to medium …

Foraging and Ramsløk – wild garlic pesto

Ramsløk as it is known in Norway, is also known as ramsons, buckrams, wild garlic, broad-leaved garlic, wood garlic, bear leek or bear’s garlic. Latin name: Allium ursinum Long overlooked, Ramsløk has made a comeback of late, gourmet restaurants and epicureans everywhere are hoarding what they can. There are few places locally where it grows, and hopefully those special places, much like favourite mushroom spots will remain secret such that it will continue to grow and those who harvest it are responsible and follow the foraging rule of take no more than 1/3 of what is available. Doing so will help it thrive for generations to come. Last year, our family took a course on local wild edibles, wandering the path and woods, collecting and nibbling as we walked. It was a revelation to see what can be foraged locally and was of immense value to increasing our knowledge about local food. We are fortunate to live in an area where we are able to obtain wild mushrooms, game, mussels, oysters, fish and more. We are blessed to …

dehydrated vegetables and herbal salt

An interesting day at Hellviktangen’s farmers market this weekend. A lot less people came, likely due to the rain, but the ones who were there were very keen on hearing details about the products that I had available. One  item that brought about great interest was my seasoned salt. Such a simple ingredient to have on hand and it can be used on so many ways. Throughout the growing season, while everything is fresh and abundant, I do my best to preserve what I can. One of the methods I use is dehydration. My pantry is full of mason jars with a huge variety of dried goodness in them. My trusty mandoline which has been well used for over a decade makes quick work of the task, and once thinly sliced, I place everything in the dehydrator and let it go to work over night. I dehydrate at no more than 40C (104F) in order to maintain the optimum nutritional value. While I do not adhere to the Raw Diet, I choose to use this process for dehydration …

Calendula salves and ‘tub tea’

Calendula.. ahh.. such an amazing plant! This week for the farmers market at Hellviktangen, I am putting together more of my salves and ‘tub teas’. Throughout the summer I collected calendula from Ekebo, our collective farm. The more you pick, the more buds appear, it is amazing what mother nature can do. Once home, I laid them out on trays to set in the dehydrator. I prefer to keep the temperature down and wait longer than to rush the process and risk overheating the flowers. Once they are bone dry, I remove the petal from their stems and store them in a clean airtight jar to be used in a myriad of ways. In order to make an infused oil from them, fill a clean jar halfway with petals and then top up with the carrier oil of your choice. Many use olive or coconut oil, but I prefer almond oil for skin products. Vitamin E can also be added to help prevent your oil from going rancid. Let the oil sit in a warm spot …

leather handles on felt bags

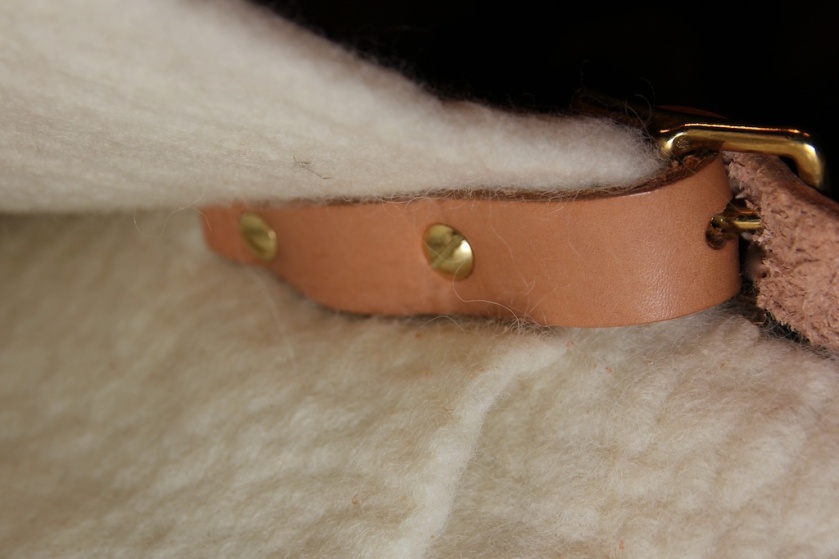
A while back, I blogged about the raw wool felted laptop bag (see post) that I created for myself, and I thought I would show how the handles were made. Store bought handles of all shapes, sizes and colours are available in most craft stores (or online), but in my opinion, nothing beats a good quality, handmade, adjustable thick leather strap with solid brass fittings. I have not used a pattern for doing this.. I simply gauge the size based on the bag and what feels comfortable. The only factor to consider is the width of your buckle. I cut five pieces of leather, one for the strap, and two shorter pieces that are doubled over and secured to the felt itself using chicago screws (leather bond optional), and two narrower pieces that are looped to keep the strap from flailing about. The side pieces are very simple.. an oval hole in the middle for the buckle to pivot, and in this case two holes matched up on each side.  Punch matched holes in your …

Kiln fired enamel

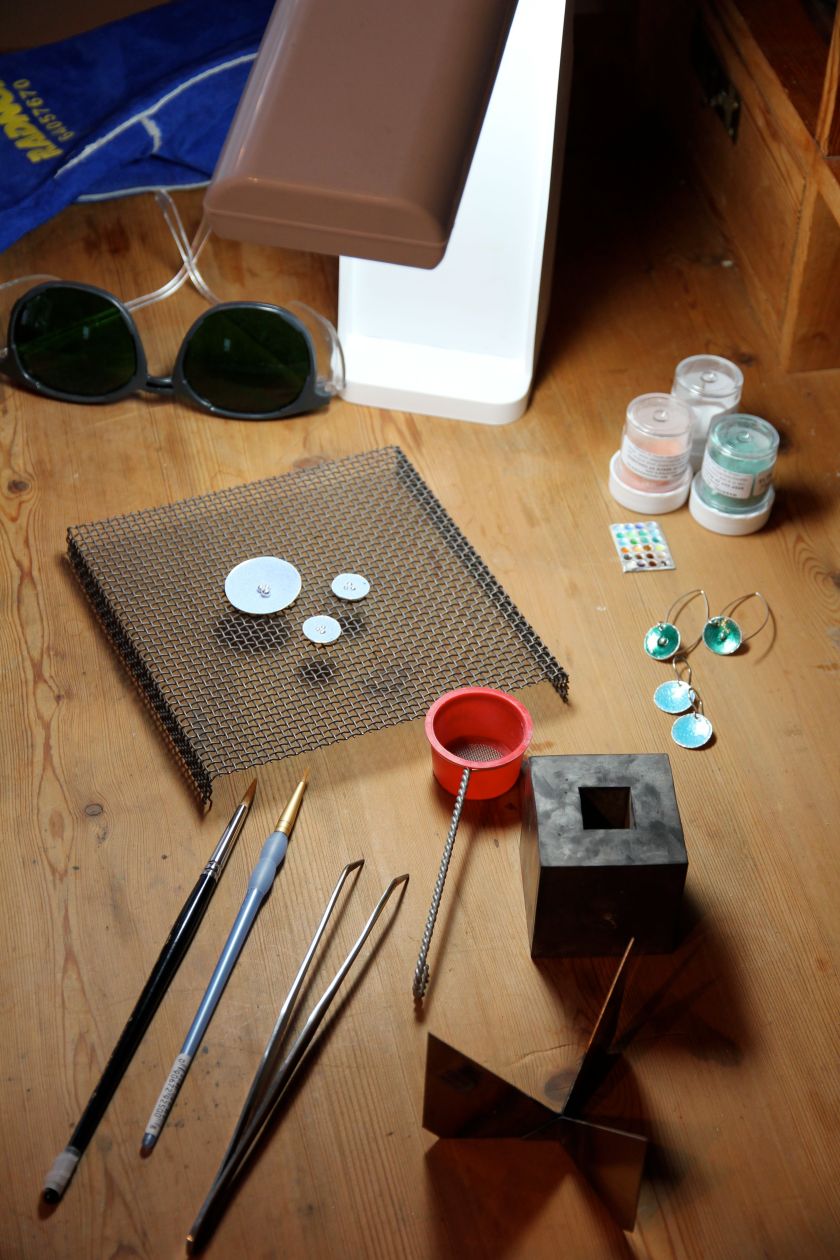
Enamel – a fantastic way to bring some colour into what can often become a world of black and white when working with silver. This week, I have been testing a set of colours from Thompson Enamels – transparent/lead free for use on silver/copper/gold. Enamel is powdered glass which, when heated melts, flows and hardens to a smooth, durable vitreous coating on metal. Enameling can also be done on glass or porcelain, but requires enamels with a different COE (Coefficient Of Expansion) – expansion rates must be suited to the base surface material. Prior to using enamels, they need to be washed to remove the “fines” – (extra fine particles which can cause your enamel to be cloudy). This can either be done: wet: by rinsing in water multiple times until the water runs clear or dry: by using a series of sifting pans to separate the particle sizes (60, 80, 100 mesh etc.) Regardless of which technique you plan on using to apply the enamel, the silver must be properly prepared, polished and cleaned to …

cochineal and shibori

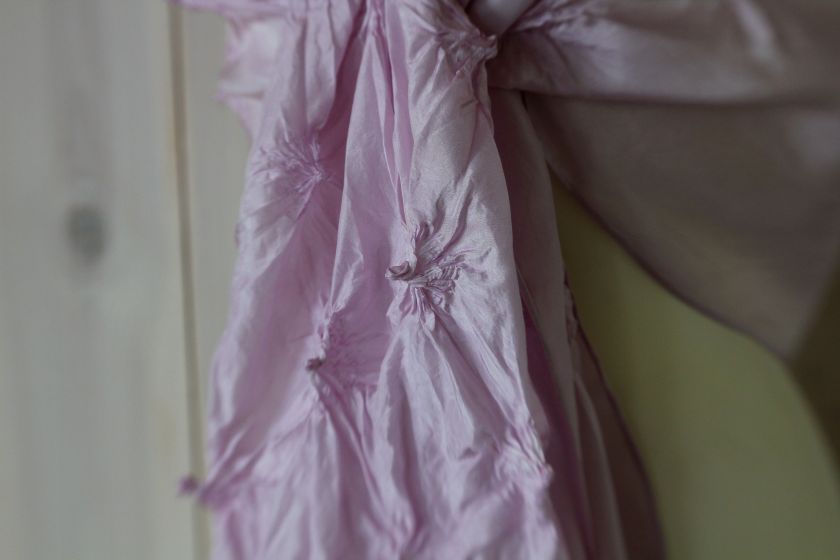
but where does it come from? Bugs. Yes, little scaly bugs that live on prickly pear cacti in the desert. Once dried and ground up to a fine powder (I use an old coffee grinder). These little critters give off the most stunning colours from the palest, softest pinks to the deepest crimson. I ground my bugs a few days ago, and brought them to a near-boil then left to cool for 24 hours. During which time their colour releases to create a deep crimson liquid. I strained it through a silk lined sieve and saved the ‘pulp’ to try and use again. Cochineal will produce a variety of colours dependant on the mordant used. In this dye bath, I used Alum. I tossed in a few silk cocoons, as they make such a lovely colour reference, and will surely be used in a project one day. Once I had the colour I was looking for, I rinsed and centrifuged the silk and let is dry. After drying completely, I undid the resists and carefully …

the green turns blue before your eyes as it oxides

indigo and shibori

Summer.. mother nature at her best. Long sunny days, swimming in the cool sea, meals under the blue sky … It also brings along vacation for the little ones, mine included. These early summer days have spoiled us, we have had sun filled days at the beach and spend much of our time these days outside. It is the perfect opportunity for me to work on some projects that can be done outside. Projects that can be picked up (or put down) at a moments notice, allowing me to pay attention to the needs of my children. Long days in the studio where attention to timing (ie.. light sensitive material) will have to wait. For those of you who know me personally, you know that I am a reader. No… not a fiction reader, but a reader of reference books, how-tos, I read everything I can get my hands on regarding Crafts – not craft as in ‘get a glue gun..’, but Craft as in time honoured traditional techniques, skills passed on through generations. It …

bomaki shibori – tutorial

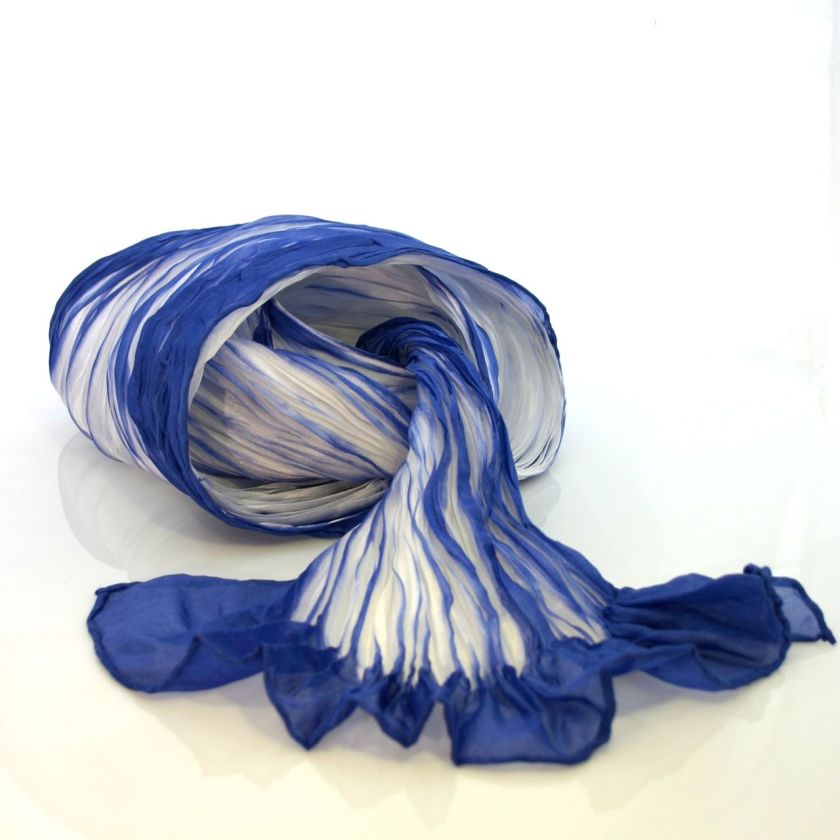
Lately I have had been reading everything I can get my hands on regarding shibori, the japanese art of creating texture and colour on cloth. There are an incredible variety of styles and techniques that are encompassed in the Shibori classification. Here are some photos (and a quick tutorial) of a piece I made using the bomaki shibori technique.