All posts filed under: Design

Upcycled and put to new use

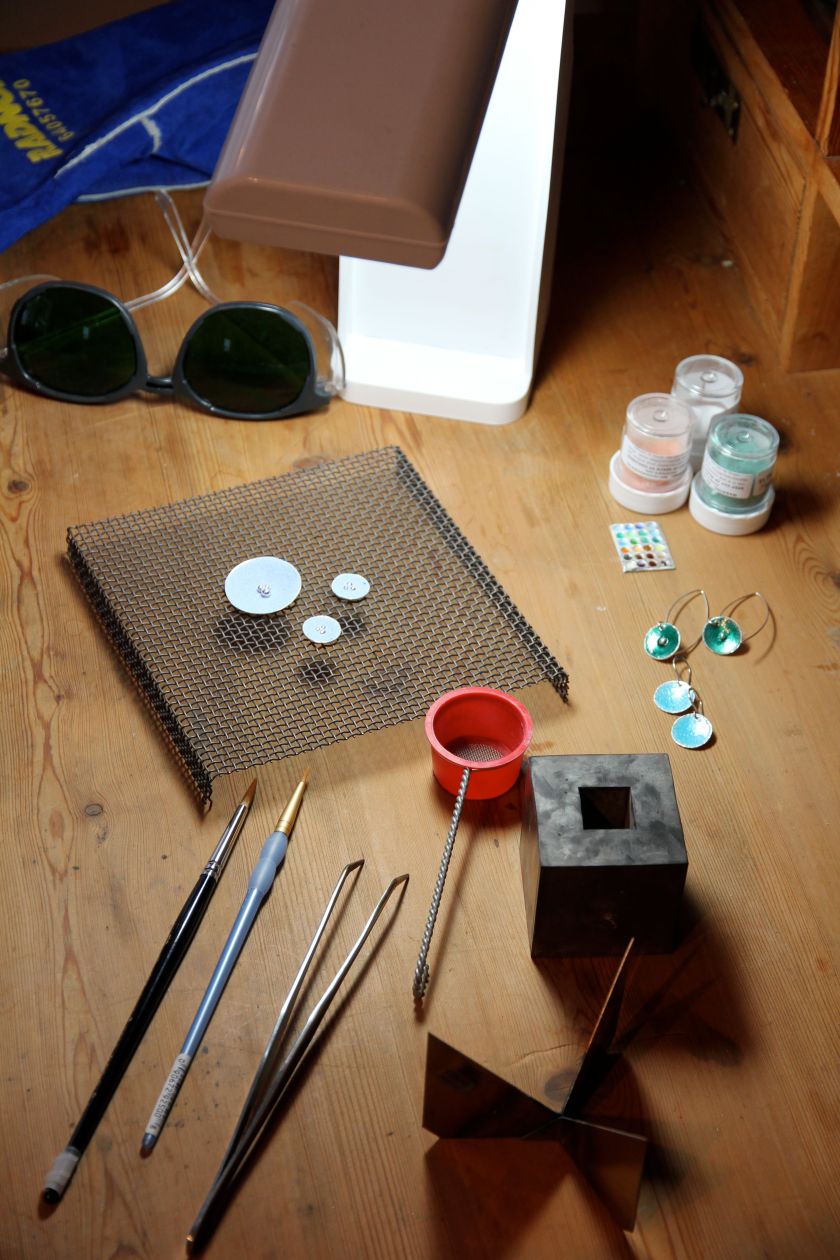
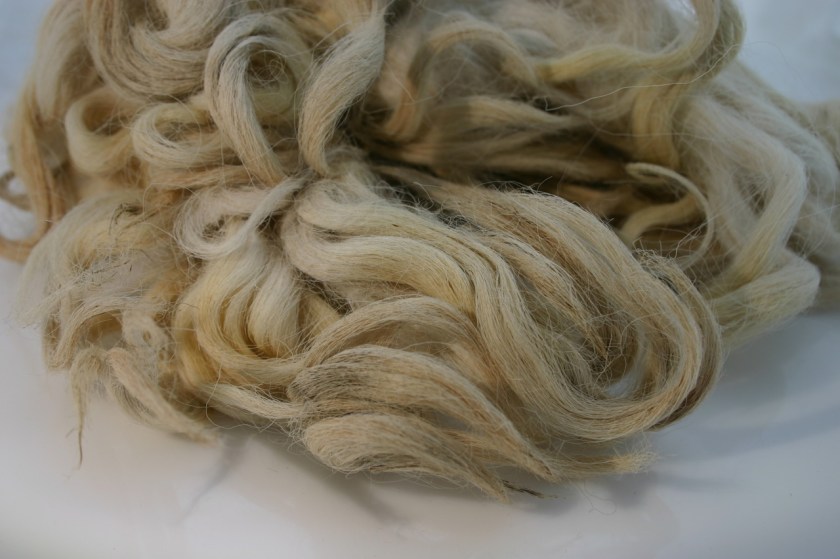
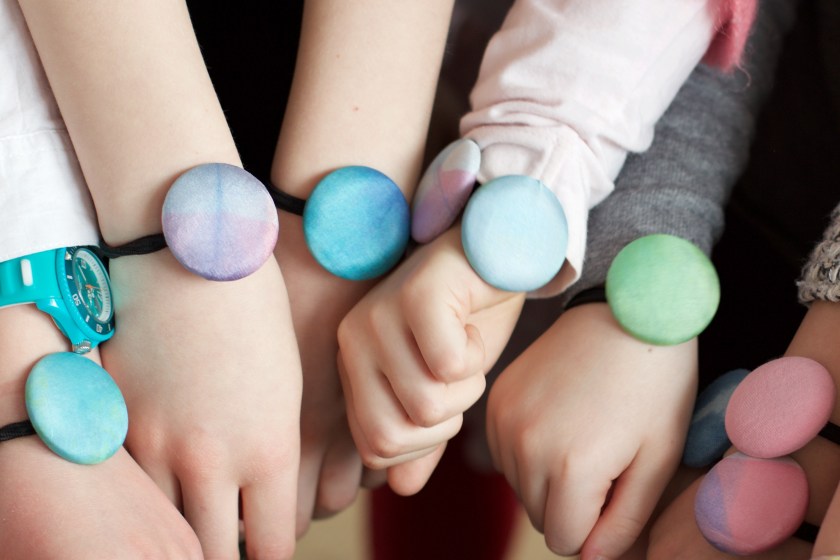
  Every year for my daughters birthday, we try and include an activity as part of her birthday celebration. The girls are getting older, and it is a delight to see them work together. Last year, as part of the UN declaring 2015 the year of the Soil, we planted tomatoes (see our blog post here), I have heard some managed to even keep the plants going all season and enjoyed the ‘fruits of their labour’. This year, we decided to do upcycle old clothes and silk test samples from the studio into hair accessories, they were all very pleased with the results, so am I. To learn how to make fabric covered button parts, you can read my post from 2009 here. The details about adding pony tails is also included. My daughter who is now 10, is in full production mode to make a series that she can give as gifts, and maybe even sell 😉  

2015 – International Year of Soil

2015 has been designated by the United Nations Food and Agricultural Organization as the International Year of Soil. Today we celebrated our daughters 9th birthday, and soil was on the agenda! Soil has been on my mind on more ways than one.. permaculture, composting, bokashi, chicken manure and more.. but today it was all about children, 15 níne year olds, your typical birthday party – with a twist.. a soil cake and a make and take party favour, that hopefully will yield edibles for them to enjoy this summer 🙂 Organic Heirloom tomatoes (blue beauty, black cherry and  yellow pear tomato) as well a few who preferred Big Max pumpkins (let’s hope their parents can find a place to plant those!) 😉  and calendula flowers (one of my favourites – see my post on calendula salves and tub tea) I think our children enjoy party prep as much, if not more than the party itself… this year they did most of the work 😉  cake decorating has become a family affair and they even made the hand dipped beeswax …

Collaboration – just like bees in a hive

you can’t make honey alone, and even if you could… wouldn’t you want someone to share it with? Lately the concept of collaboration and sharing  has been at the forefront of what is going on in my life. Having received many comments about how refreshing people find it that I freely share my knowledge and skills – I am always taken a little aback – and think about why that is so unusual? Isn’t that what makes everything work? We all have our strengths and weaknesses and when we band together to share, don’t we all win? I redesigned the website this week to encompass the changing aspects of my life and projects, but one thing has not changed, collaboration is something I hold near and dear to my heart. I have made some wonderful friends working on joint projects, everything from FeltUnited, to Ekebo our CSA farm, to the farmers market, to our Lavvo project for the school spending many a weekend sweating in the woods with a hammer and a saw.  😉 My latest endeavour, a local food coop project …

New tool in the studio

Over the holidays, the studio welcomed its newest tool, a plotter (cutter). There are many on the market, each having their own pros and cons, but after having done some research, I found the one for me. I have always had a love for words.. quotes and sayings… and being a font addict with a reasonable handle on graphic design and a love for Adobe Illustrator, the possibilities with this machine are endless! It cuts so much more than vinyl… cardstock, fabric, stencils for glass etching and fabric stenciling, heat transfer for clothing.. and I have even sourced reflective heat transfer for clothing. That may sound crazy to most of the world, but living in Norway, the dark season makes wearing reflects mandatory. My son has decided he wants to start a business selling his own reflects designs.. and he is only 8! Time to make space in the studio. Yesterday I made my first wall piece from vinyl. Well beyond the standard size of the plotter (the wording is just over a meter high), …

leather handles on felt bags

A while back, I blogged about the raw wool felted laptop bag (see post) that I created for myself, and I thought I would show how the handles were made. Store bought handles of all shapes, sizes and colours are available in most craft stores (or online), but in my opinion, nothing beats a good quality, handmade, adjustable thick leather strap with solid brass fittings. I have not used a pattern for doing this.. I simply gauge the size based on the bag and what feels comfortable. The only factor to consider is the width of your buckle. I cut five pieces of leather, one for the strap, and two shorter pieces that are doubled over and secured to the felt itself using chicago screws (leather bond optional), and two narrower pieces that are looped to keep the strap from flailing about. The side pieces are very simple.. an oval hole in the middle for the buckle to pivot, and in this case two holes matched up on each side.  Punch matched holes in your …

felted laptop bag – using raw fleece

Forever inspired by my dear friend Elis Vermeulen of Holland to work with raw fleece (see my previous post on working with Texel with Elis), I decided to make myself a laptop bag a while back using my favorite medium. I have yet to add the straps (really need some studio time this week), but will be using some good quality leather with a buckle to make it adjustable. The base is made using norwegian C1  (I planned for a shrinkage of 30%). It is the perfect wool for sturdy bags. It produces a nice firm felt that hardly pills and wears well.  Now to pull out a hide of leather and some brass findings. Oh! by the way, if you are interested in learning more about how to work with raw fleece, Elis will be teaching a bag class at the Creative Felt Gathering in Michigan this september. See her website for more details, or contact her to arrange a workshop in your area.

Kiln fired enamel

Enamel – a fantastic way to bring some colour into what can often become a world of black and white when working with silver. This week, I have been testing a set of colours from Thompson Enamels – transparent/lead free for use on silver/copper/gold. Enamel is powdered glass which, when heated melts, flows and hardens to a smooth, durable vitreous coating on metal. Enameling can also be done on glass or porcelain, but requires enamels with a different COE (Coefficient Of Expansion) – expansion rates must be suited to the base surface material. Prior to using enamels, they need to be washed to remove the “fines” – (extra fine particles which can cause your enamel to be cloudy). This can either be done: wet: by rinsing in water multiple times until the water runs clear or dry: by using a series of sifting pans to separate the particle sizes (60, 80, 100 mesh etc.) Regardless of which technique you plan on using to apply the enamel, the silver must be properly prepared, polished and cleaned to …

cochineal and shibori

but where does it come from? Bugs. Yes, little scaly bugs that live on prickly pear cacti in the desert. Once dried and ground up to a fine powder (I use an old coffee grinder). These little critters give off the most stunning colours from the palest, softest pinks to the deepest crimson. I ground my bugs a few days ago, and brought them to a near-boil then left to cool for 24 hours. During which time their colour releases to create a deep crimson liquid. I strained it through a silk lined sieve and saved the ‘pulp’ to try and use again. Cochineal will produce a variety of colours dependant on the mordant used. In this dye bath, I used Alum. I tossed in a few silk cocoons, as they make such a lovely colour reference, and will surely be used in a project one day. Once I had the colour I was looking for, I rinsed and centrifuged the silk and let is dry. After drying completely, I undid the resists and carefully …

the green turns blue before your eyes as it oxides

indigo and shibori

Summer.. mother nature at her best. Long sunny days, swimming in the cool sea, meals under the blue sky … It also brings along vacation for the little ones, mine included. These early summer days have spoiled us, we have had sun filled days at the beach and spend much of our time these days outside. It is the perfect opportunity for me to work on some projects that can be done outside. Projects that can be picked up (or put down) at a moments notice, allowing me to pay attention to the needs of my children. Long days in the studio where attention to timing (ie.. light sensitive material) will have to wait. For those of you who know me personally, you know that I am a reader. No… not a fiction reader, but a reader of reference books, how-tos, I read everything I can get my hands on regarding Crafts – not craft as in ‘get a glue gun..’, but Craft as in time honoured traditional techniques, skills passed on through generations. It …

bomaki shibori – tutorial

Lately I have had been reading everything I can get my hands on regarding shibori, the japanese art of creating texture and colour on cloth. There are an incredible variety of styles and techniques that are encompassed in the Shibori classification. Here are some photos (and a quick tutorial) of a piece I made using the bomaki shibori technique.