A while back, I blogged about the raw wool felted laptop bag (see post) that I created for myself, and I thought I would show how the handles were made.
Store bought handles of all shapes, sizes and colours are available in most craft stores (or online), but in my opinion, nothing beats a good quality, handmade, adjustable thick leather strap with solid brass fittings.

Laptop bag – raw fleece, with 3 inside pockets and cowhide straps – this mannequin is a little size 8.. on me (178cm 5’10 tall) the bag sits higher.
I have not used a pattern for doing this.. I simply gauge the size based on the bag and what feels comfortable. The only factor to consider is the width of your buckle. I cut five pieces of leather, one for the strap, and two shorter pieces that are doubled over and secured to the felt itself using chicago screws (leather bond optional), and two narrower pieces that are looped to keep the strap from flailing about.

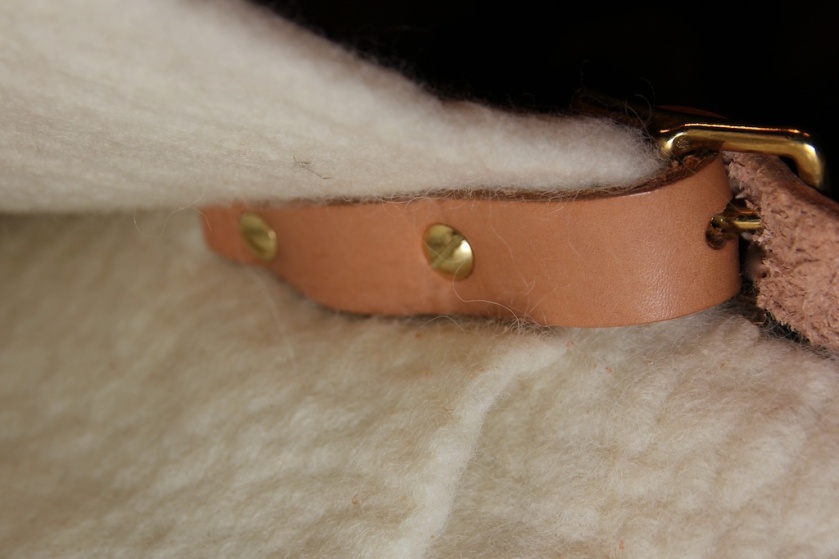
undone.. this shows the part that is secured to the bag. It is doubled over so that the wool felt is sandwiched between two layers of leather. This is very solid, and can easily bear the weight of a laptop and more.
The side pieces are very simple.. an oval hole in the middle for the buckle to pivot, and in this case two holes matched up on each side. Punch matched holes in your felt bag to line up with the holes you have punched in your leather, from there, the assembly is self explanatory. If you feel that the leather is took thick to bend smoothly where the buckle is, use the shaver to thin the area.. it helps!) You may sometimes feel like you need three hands to assemble it all, while screwing together the chicago screws, but it can be done!
The leather used on this project is a 6-7 ounce natural cowhide. You can buy precut leather straps in various widths, or use a strap cutter (see image below) and make it just the way you want. I treat my leather (pre-assembly) with neatsfoot oil, it keeps the leather soft, and gives it that warmth of colour that only gets better with age and wear.

top: leather cowhide rolled up, from left: leather strap ,loop, neatsfoot oil, leather strap cutter, hole punches (round and oval), chicago screws, end cutter, leather shaver and mallet
Once you have both sides assembled, you simply need to take the long strap, punch the number of holes you want on each side (for adjustability) and put it on!


Killer bag, Cynthia!
thanks you for easy explanation and sharing and I LOVE your bag!!!